[Hide]
Create a client portal for your Framer website
Copilot gives you the tools to start, run, and grow your client business. Try it for free!
4.9 rating
If you’re reading this, chances are you’re looking to add a client or customer portal functionality to your Framer website.
This way, your clients can have their own user accounts on your website and can log into a personalized dashboard when working with you.
Well, this article is for you.
As someone who runs a small SEO agency myself, creating a client portal was the first step in setting my agency apart from others. Not only does a customer, white-label client portal make your business feel premium, and almost like a SaaS product, but it also helps you manage things like leads, contracts, invoices, client communications, file management, and more.
So, in this article, I’m going to show you how to create a Framer client portal that’s designed to make your client experience feel as premium as your agency’s website is.
Does Framer have a client portal?
Framer does not have a client portal in the traditional sense. If you want to create a client portal on your Framer website, you will have to use a third-party client portal software and integrate it with your agency’s website.
In other words, you’re going to have both a front end and and back end to your website. Your front end is your marketing website, aka your Framer website. This lives on something like yourwebsite.com.
Your back end is your client portal “app” that you and your clients can log into. This will most likely live on a subdomain like portal.yourwebsite.com or app.yourwebsite.com. This way, you can create a cohesive website and make your service business look and feel like a software business.
Alright, now let’s go over step by step how to actually create a client portal on your Framer site.
5 steps to creating a client portal for your Framer website
Here are the steps to creating a Framer client portal:
- Creating a ‘Sign up’ and ‘Log in’ button on your website
- Choosing a no-code client portal builder
- Customizing your client portal experience
- Connecting your Framer website to your client portal builder
- Maintaining and updating your client portal
Alright, let’s go over through each of these, step by step.
1. Creating a ‘Sign up’ and ‘Log in’ button on your website
I’m going to assure you already have a Framer website set up.
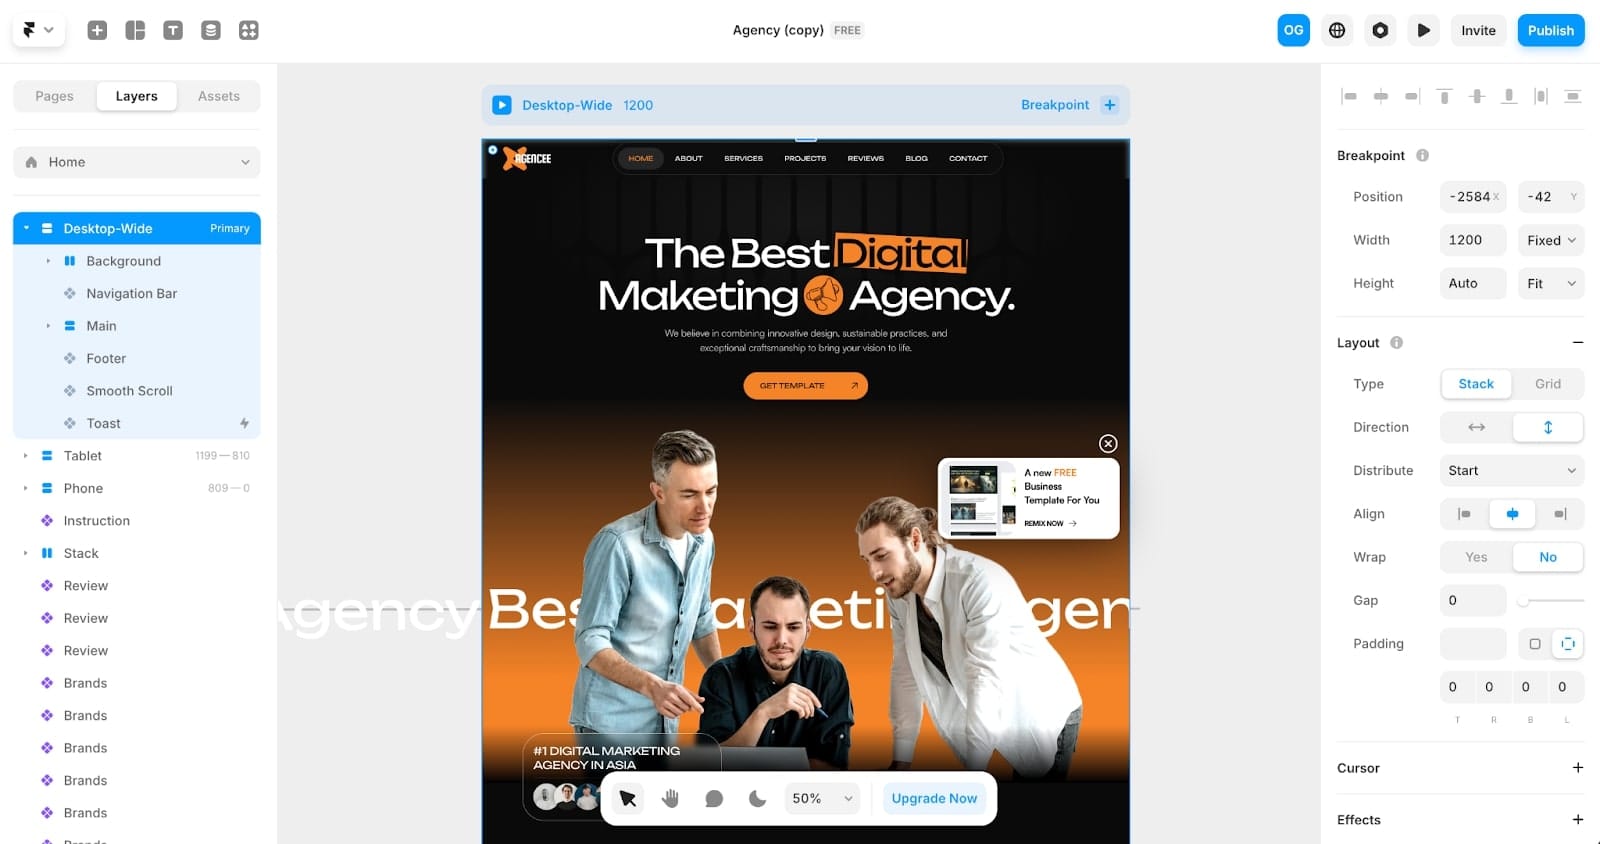
So, once you have your website ready to go, the first step is to create a way for clients to sign up for a client portal account and be able to log in at any time on their own.
Here, you want to create a ‘Sign up’ and ‘Log in’ button in your navbar:
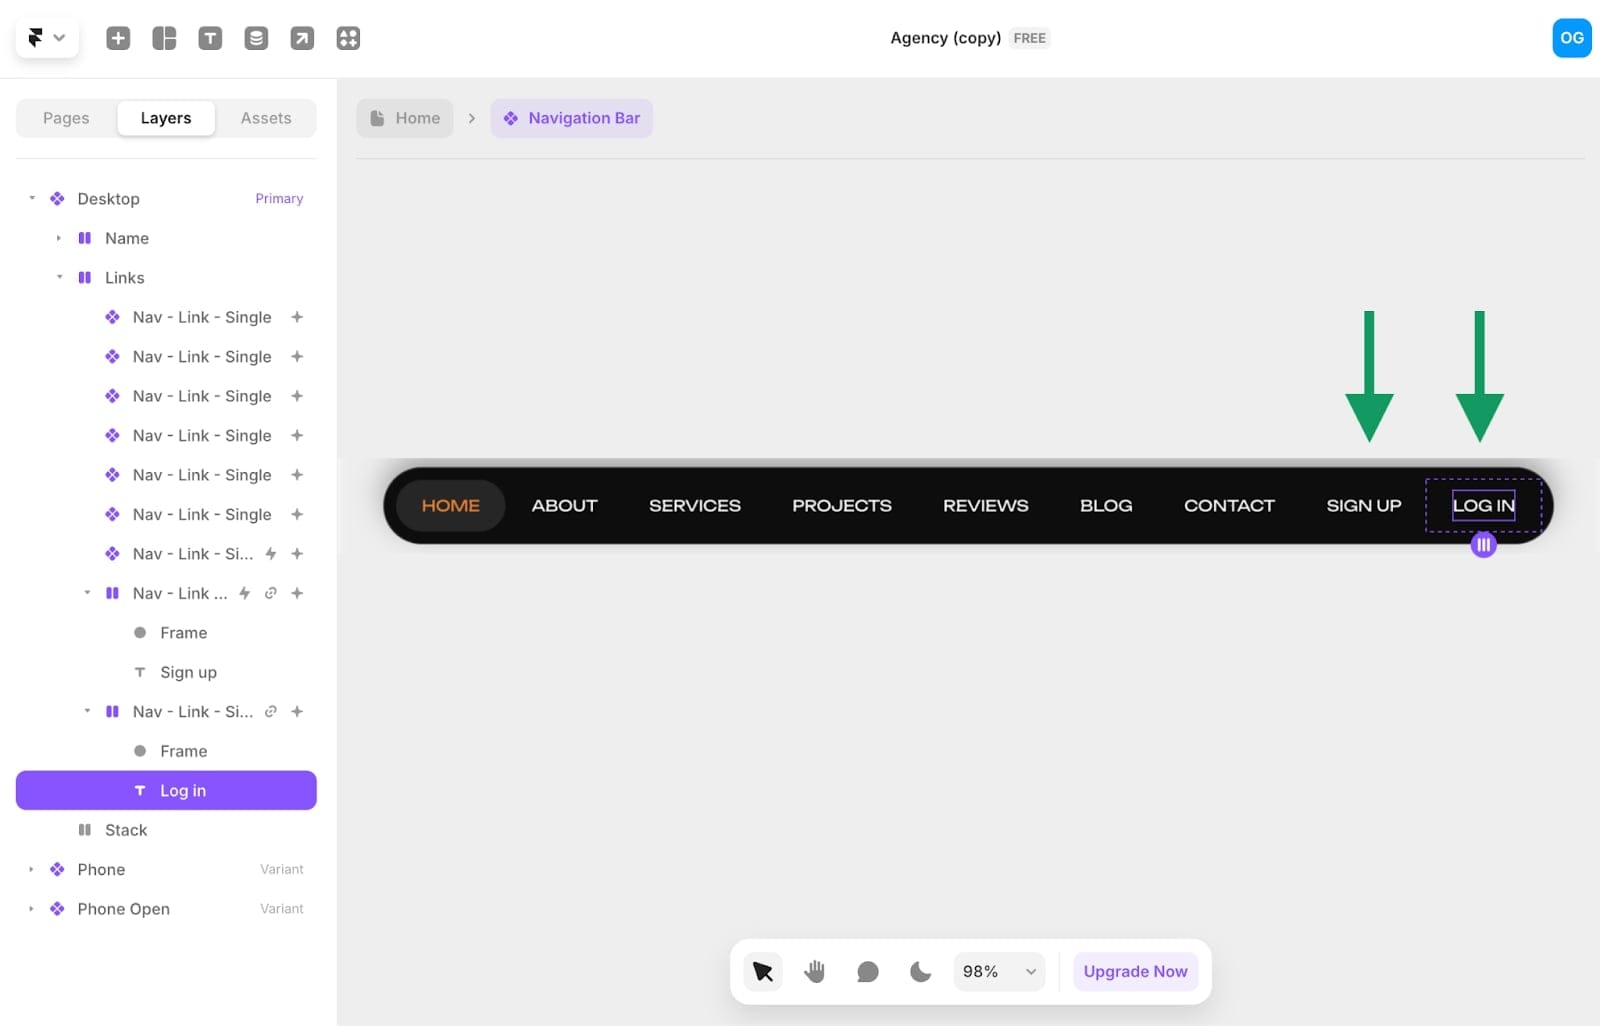
In Framer, you can either do this by copying and pasting new items in the navigation bar (like I did above for this agency website template) or you can add a new button in the nav bar.
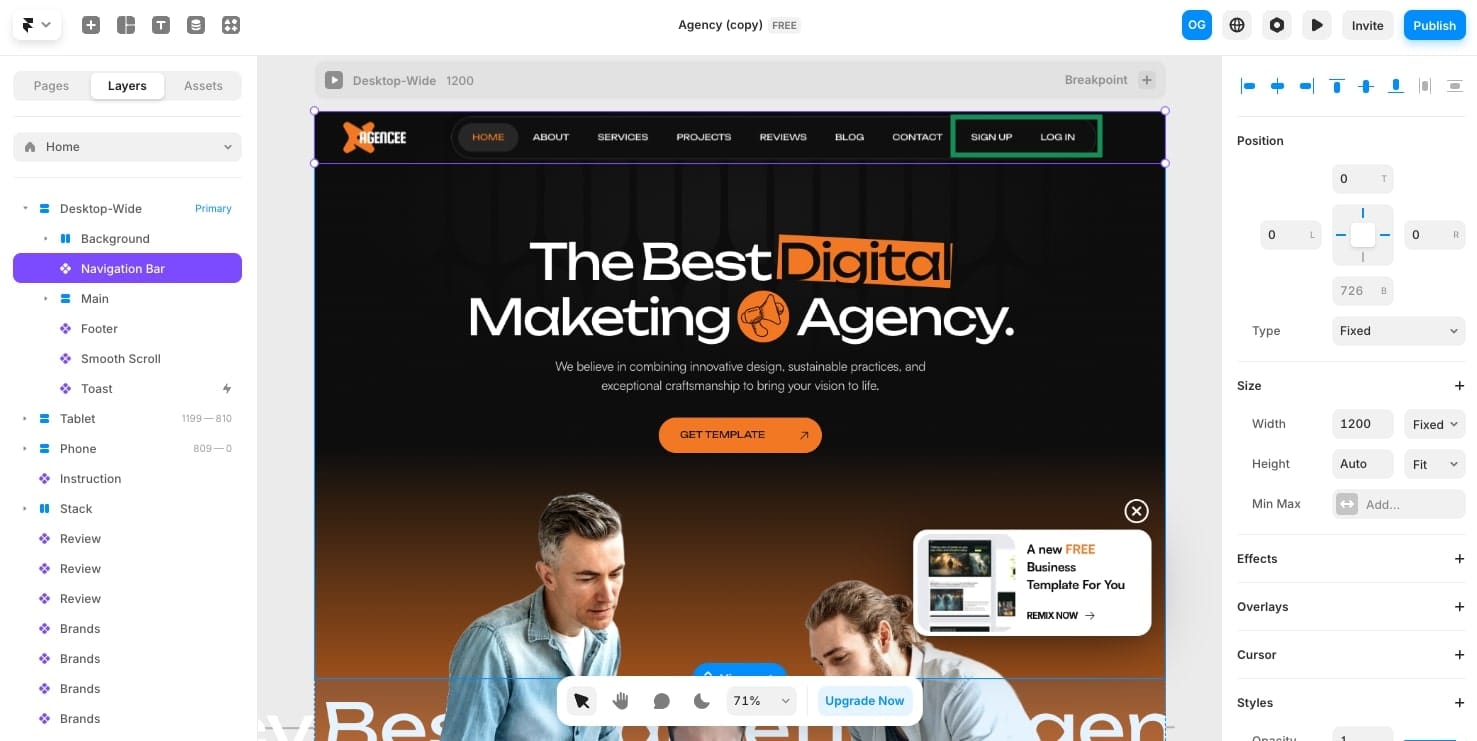
Once you have your new buttons, your navigation bar will start to look like a SaaS website! But, be careful not to publish your website yet because these buttons don’t lead anywhere just yet.
Note: Make sure your navigation bar is responsive after you add new elements to it. Check out Framer’s video on how to troubleshoot this if you run into any problems.
Alright, now let’s move on to the next step and find a solution to build our client portal with.
2. Choosing a no-code client portal builder
Step two is to find a client portal builder that best fits your needs. There are a ton of different solutions out there that can help you create client portals. However, you want to find one that is designed to work with other website builders, like Framer.
In this case, we can use Copilot — a no-code client portal builder that allows you to create white-labeled portals. With Copilot, you can bring all of your service business operations under one roof — from messaging, payments, contract signing, file-sharing, and integrations with existing third-party apps you may already be using.
Disclaimer: I am not an employee of Copilot. I am a customer and love to platform which is why they allowed me to write this blog post!
Copilot actually has a full guide on how to set up and navigate your client portal. However, for the sake of simplicity, we’ll quickly walk through the initial setup stages here. The first step is to create a free Copilot account. You can do that here.
Once you log into your admin dashboard, you will be presented with this screen:
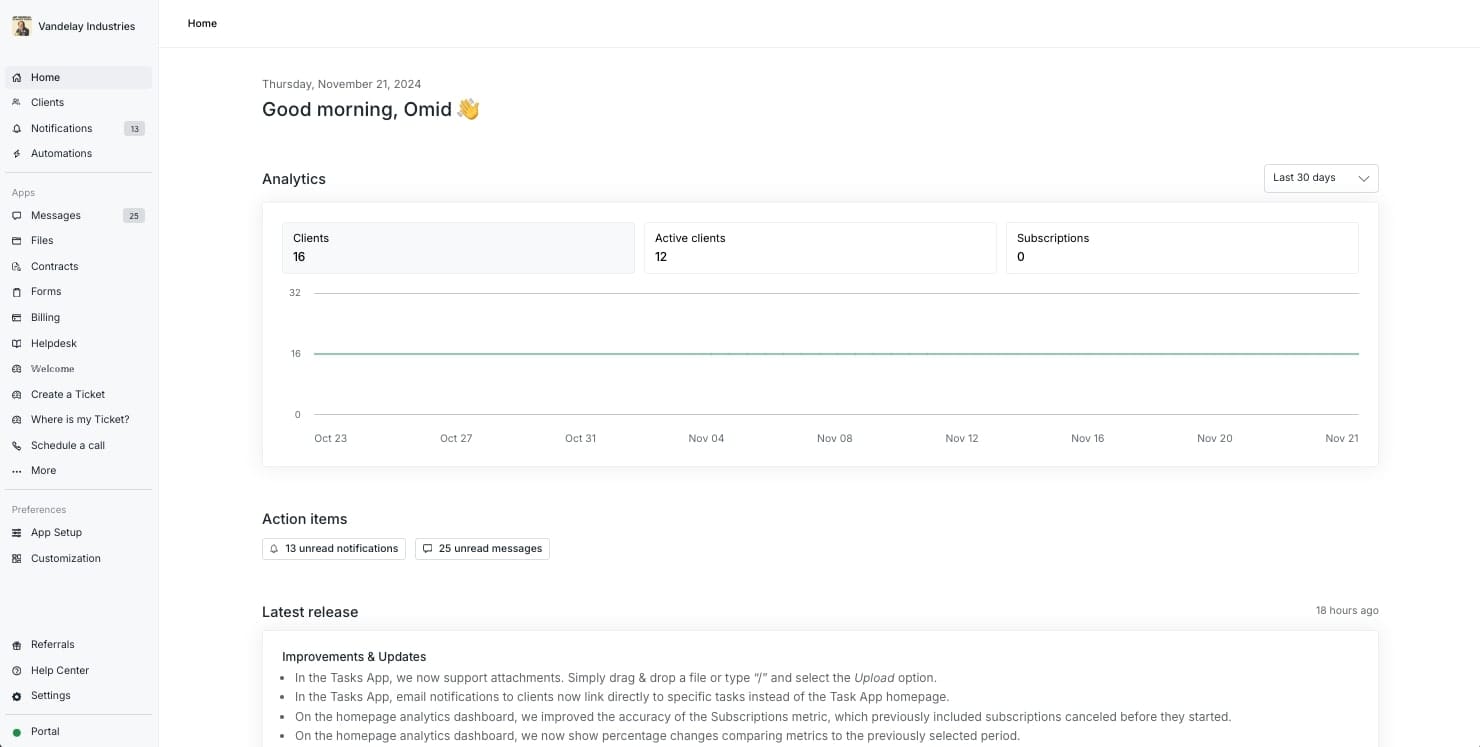
This is the view you will have as an admin, not the view your clients will see. You will be able to see everything from your analytics, how many action items you have (like messages to respond to or other notifications), and extra resources to help you get support when setting up your admin account.
On the left-hand side, you will also see the navigation bar to access things like your messages, files, contracts, intake forms, invoices & billing, and more.
The good news is that Copilot makes it easy for your clients to create their own accounts, with or without you having to get involved. However, I highly recommend doing a test run by creating a fake client account so you can test the onboarding flow.
To do this:
- Go to the Clients page
- Click on New client → Create one client
- Enter the first name, last name, and client email
- Copy the invite link and paste it into a browser tab. Or, send an email invite to yourself and log in from the provided link.
- Activate the test client
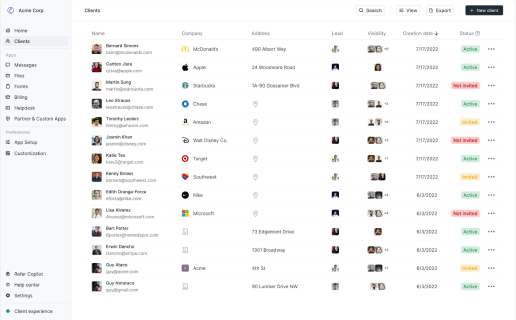
Now, you will be able to see all of your clients in the “Clients” tab of your admin dashboard.
Once you find your way in Copilot, you’ll also want to add a custom domain so your portal matches the same branding and URL as your Framer website. Copilot has a library of YouTube tutorials to help you do this. But, we’ll go over how to do this in the next section.
3. Customizing your client portal experience
Because Copilot is a white-label client portal solution, you have the ability to customize a bunch of things like how your sidebar looks, logos, colors, analytics codes, and more.
For this tutorial, we’ll just be customizing our domain name. To give your client portal a branded name for your Framer site head to your admin area and click on “Settings” at the bottom left.
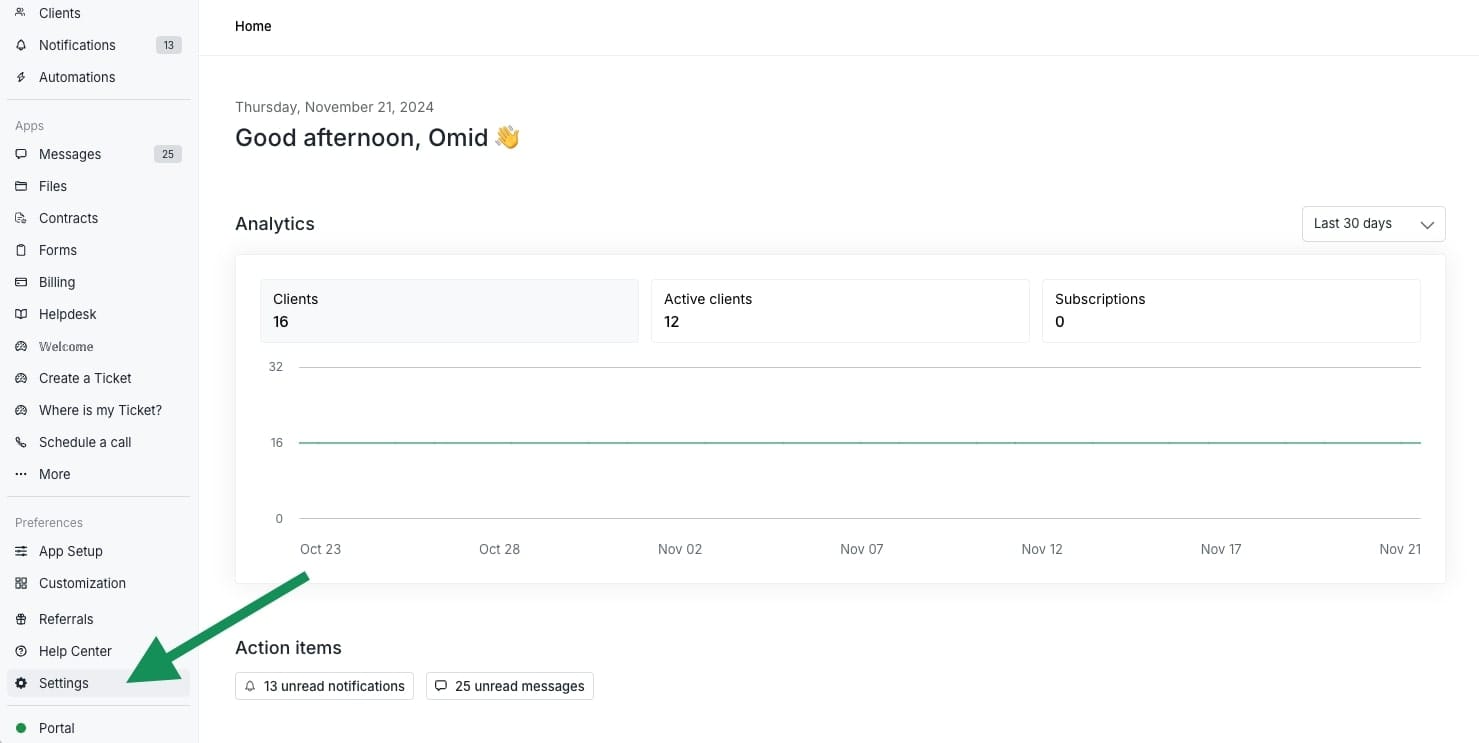
The side menu will change a bit, showing some new settings. Look for the one that says ‘Domains’ and click on it.
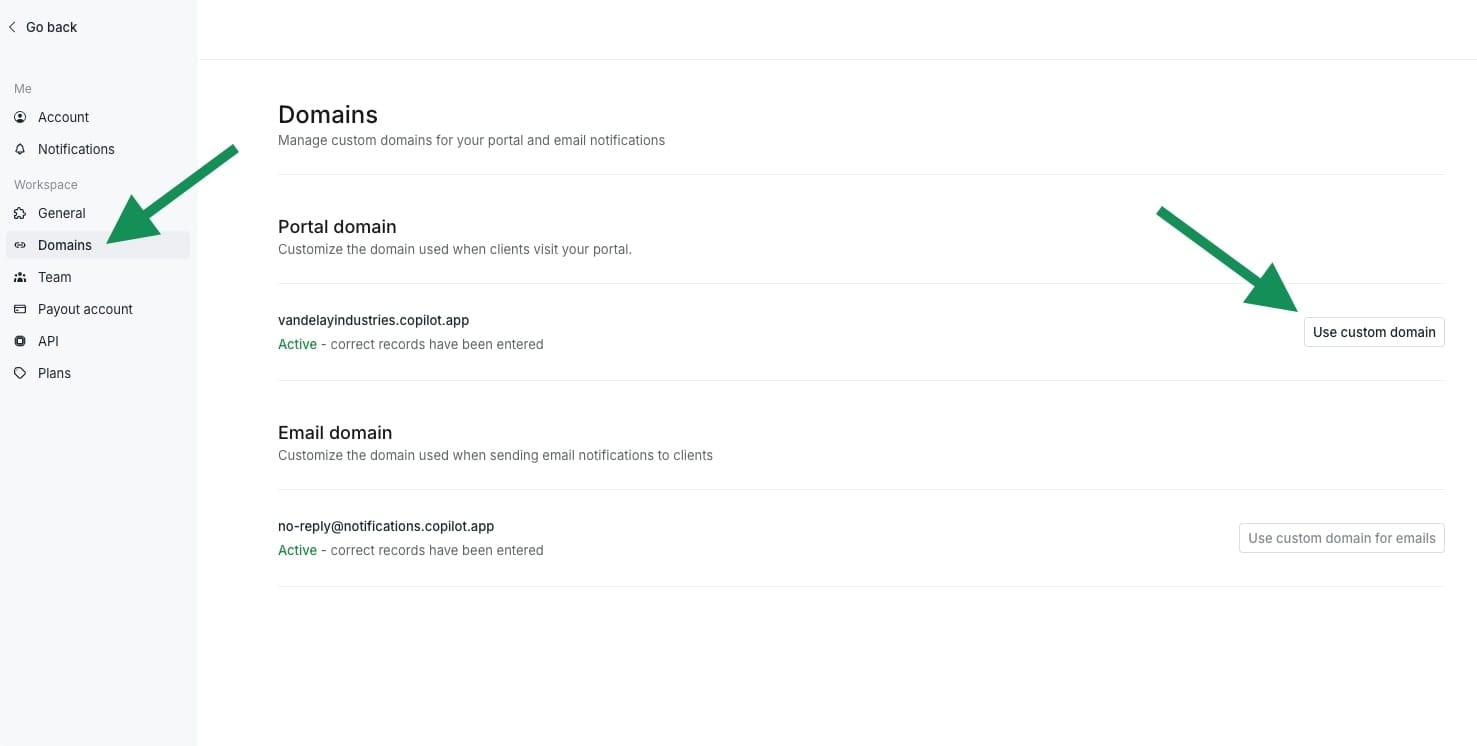
Most people who add a client portal to their site choose a special address for it, like a subdomain within their main domain.
For example, if your main Framer site is yourwebsite.com your client portal for your customers or clients could live on portal.yourwebsite.com. Many businesses like to use the name “portal” but you can use whatever you like.
If you do this, you’ll need to add your subdomain in your website’s DNS settings. The steps for this depend on where you bought your domain name. But don’t worry, there’s a step-by-step guide on how to do that here.
In our example, we have our main site, copilot.app. But our special Copilot client area is on vandelayindustries.copilot.app. That’s the address we’ll put on our main Framer site.
But before we get to that step, go back to your portal settings and click on the ‘General’ tab.
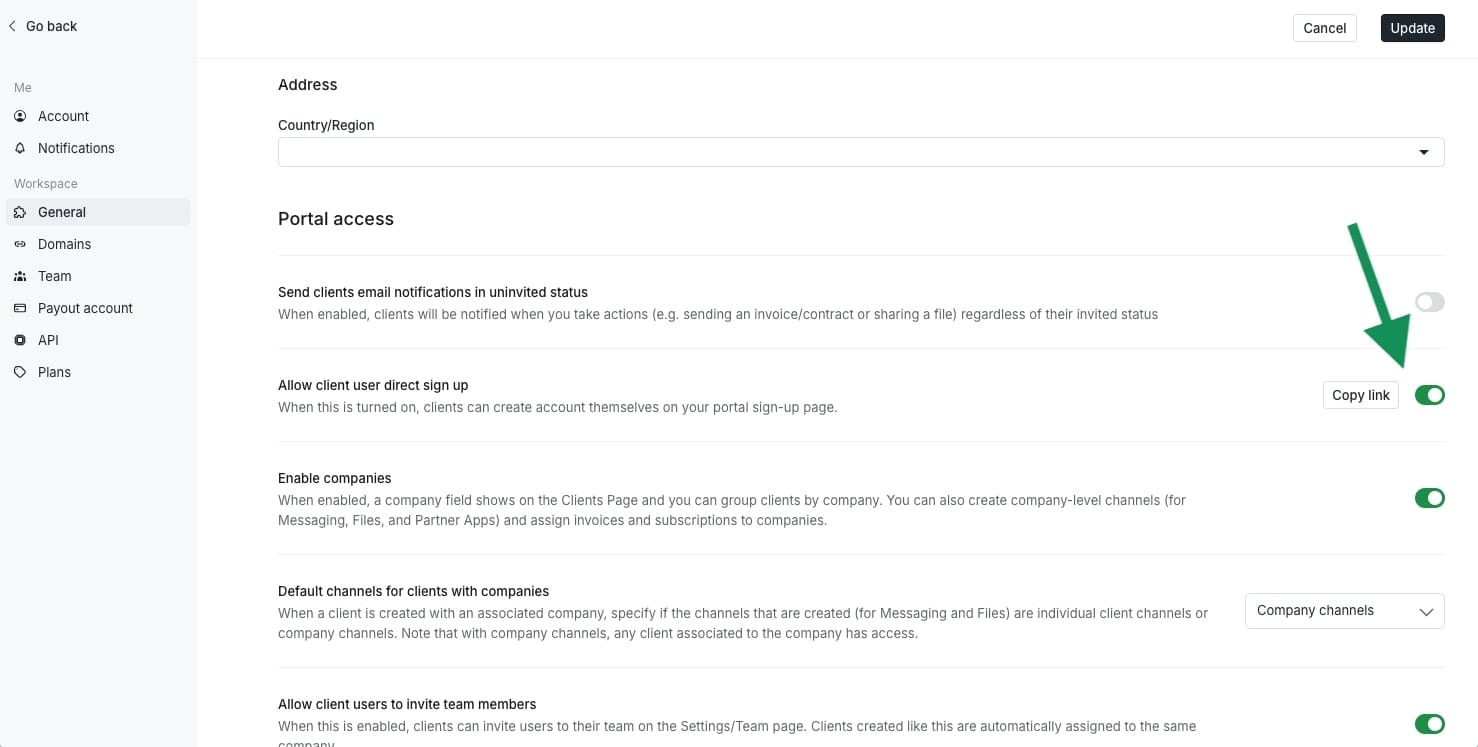
Here, you’ll want to turn on the “Allow client user direct sign up” option so clients can sign up directly from your website. You’ll also want to click on “Copy link”. This will be the link we add to our sign-up button on our main Framer website.
Now let’s put it all together!
4. Connecting your Framer website to your client portal builder
This is the part where we make our Framer customer portal come to life! Because we already created our ‘Sign up’ button in step one of this guide, this part will be super quick.
Go back to your Framer website and go back to the button you created. Click on the sign up button and on the right-hand side panel go to ‘Link’ and paste the link you copied at the end of step three of this guide.
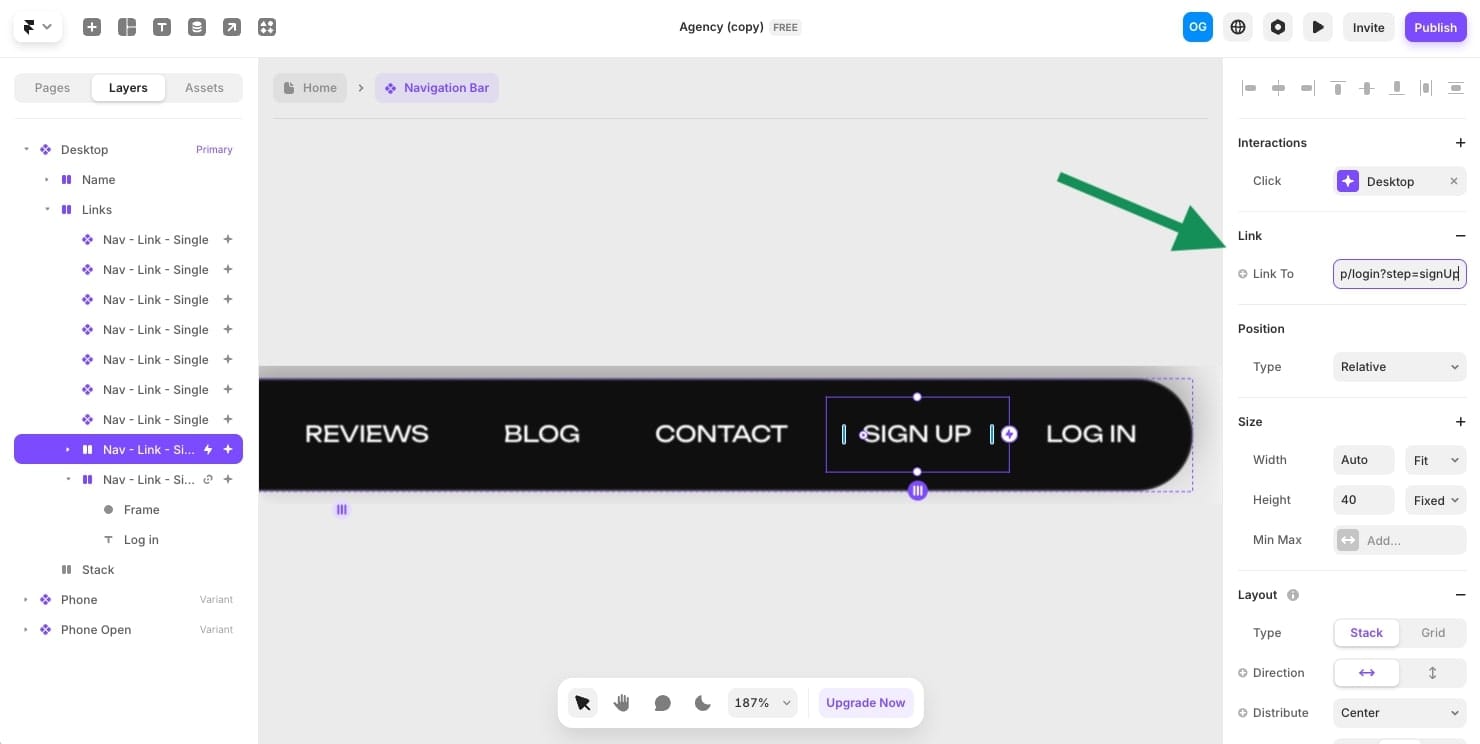
You can also choose if you want this to open in a new tab or not. This is totally up to you, but I would recommend opening it in the same tab so it gives your website visitors a clean and cohesive experience. Once you’re done, hit Publish!
Now when someone clicks on the sign-up option in your navbar, it should open the client portal sign-up page. Here clients can sign up via Google or their own email.
Note: Your sign-up page can be customized with your own logo and image (as done with the demo example shown above).
Awesome, now we have a work sign-up button on our Framer site. But, we still need to make the ‘Log in’ button work. To get the link for your log in button, simply go to your client portal sign-up page and click on ‘Already have an account?’.
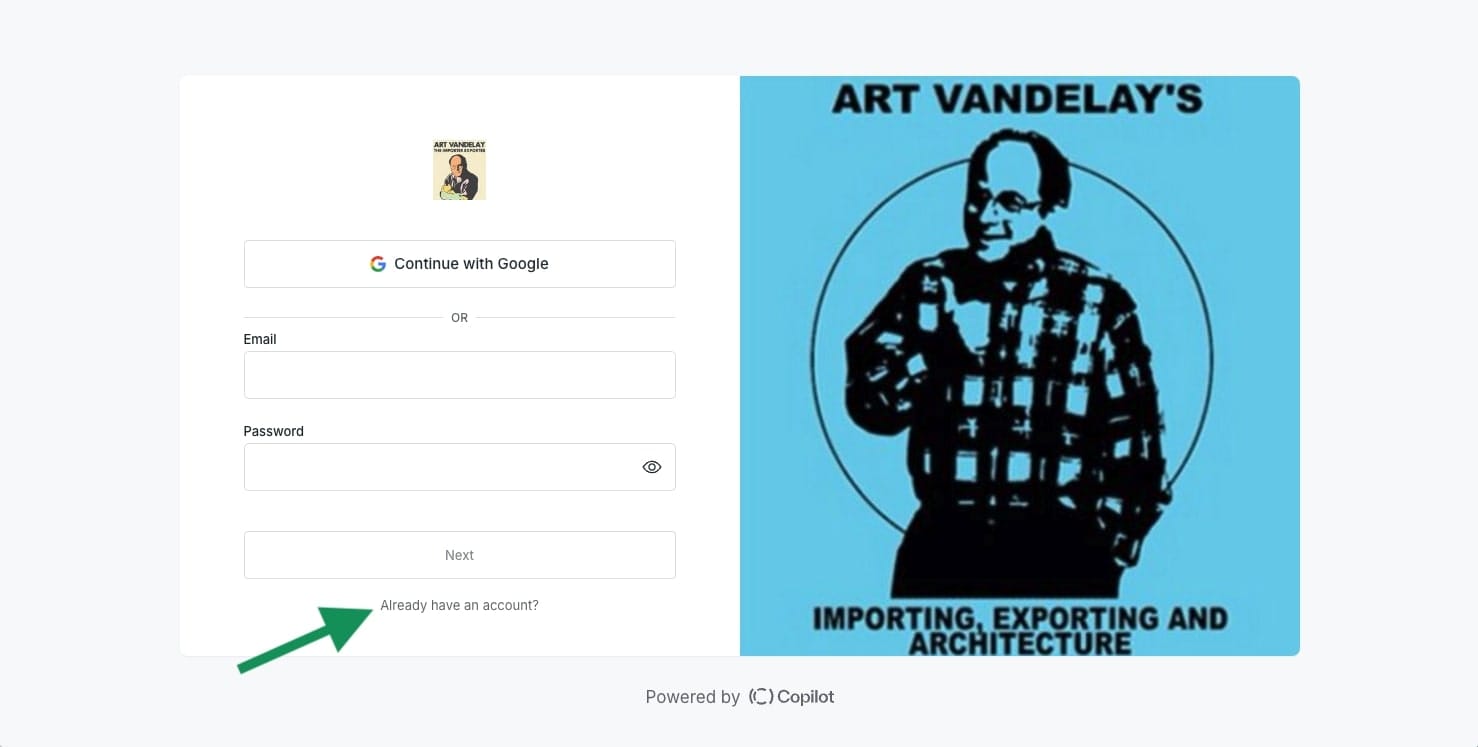
This will open up your log in page for existing clients. The URL will have a small difference compared to the sign-up page — including a ‘?step=signIn’ at the end of your client portal login URL.
Copy and paste this link into the ‘Log in’ button on your Framer website:
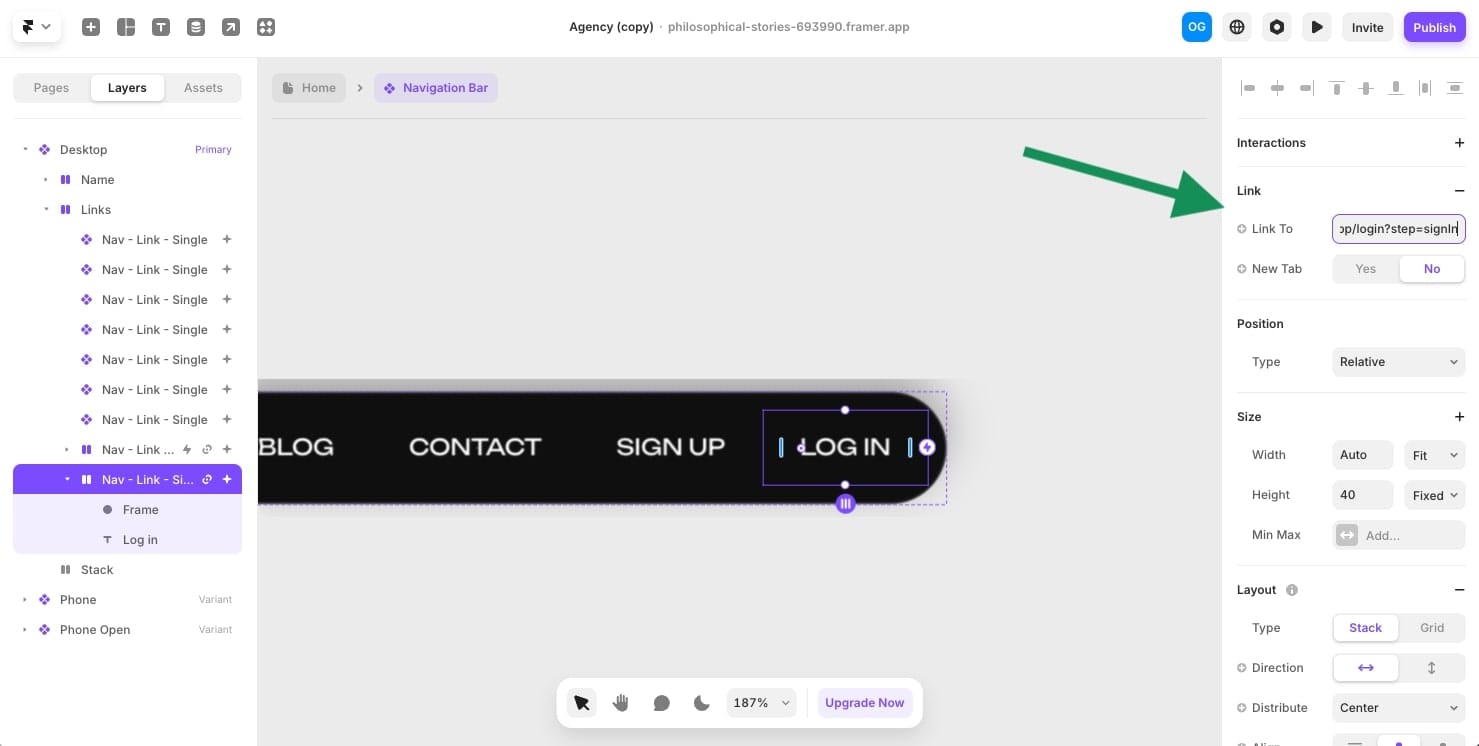
After that, go ahead and click ‘Publish’ and test the log in flow.
Voila! We now have a fully functioning Framer client portal.
5. Maintaining and updating your client portal
At this point, we are done connecting our client portal to our Framer website. However, it is a good idea to look for new integrations to add to your Copilot client portal based on your client’s needs.
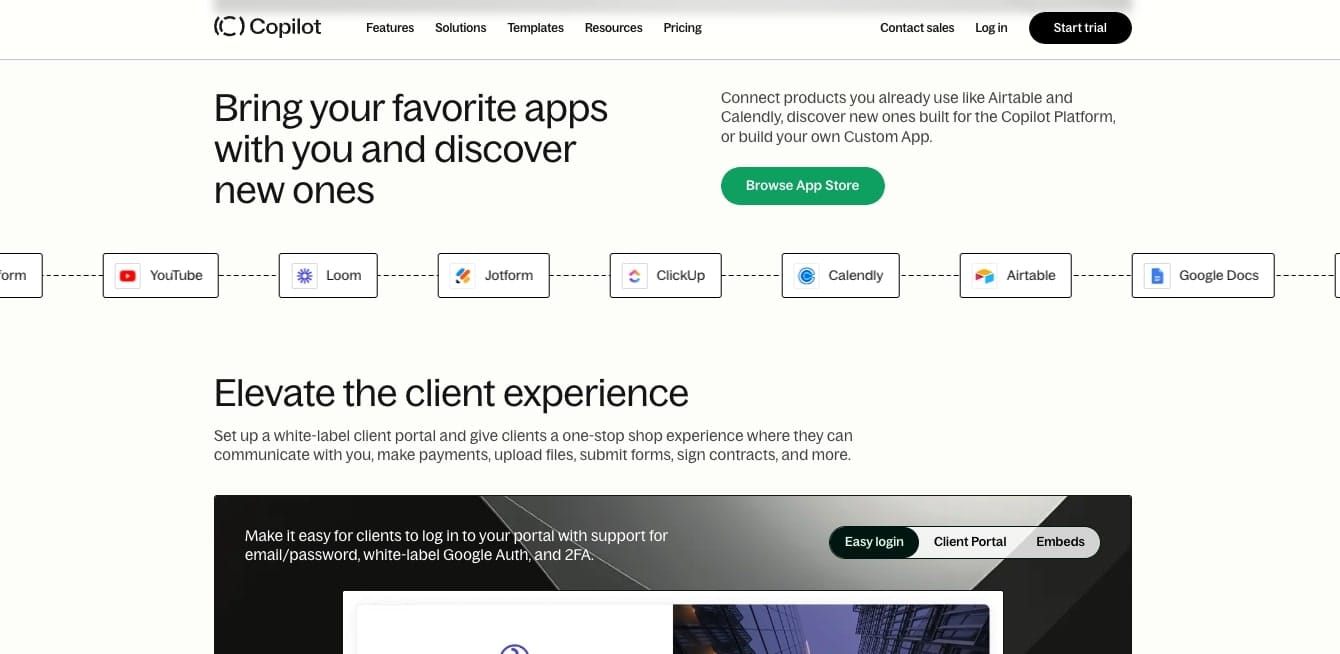
Keeping your client portal in great shape is a bit like tending to a garden. It requires regular attention, occasional pruning, and an eye for potential improvements.
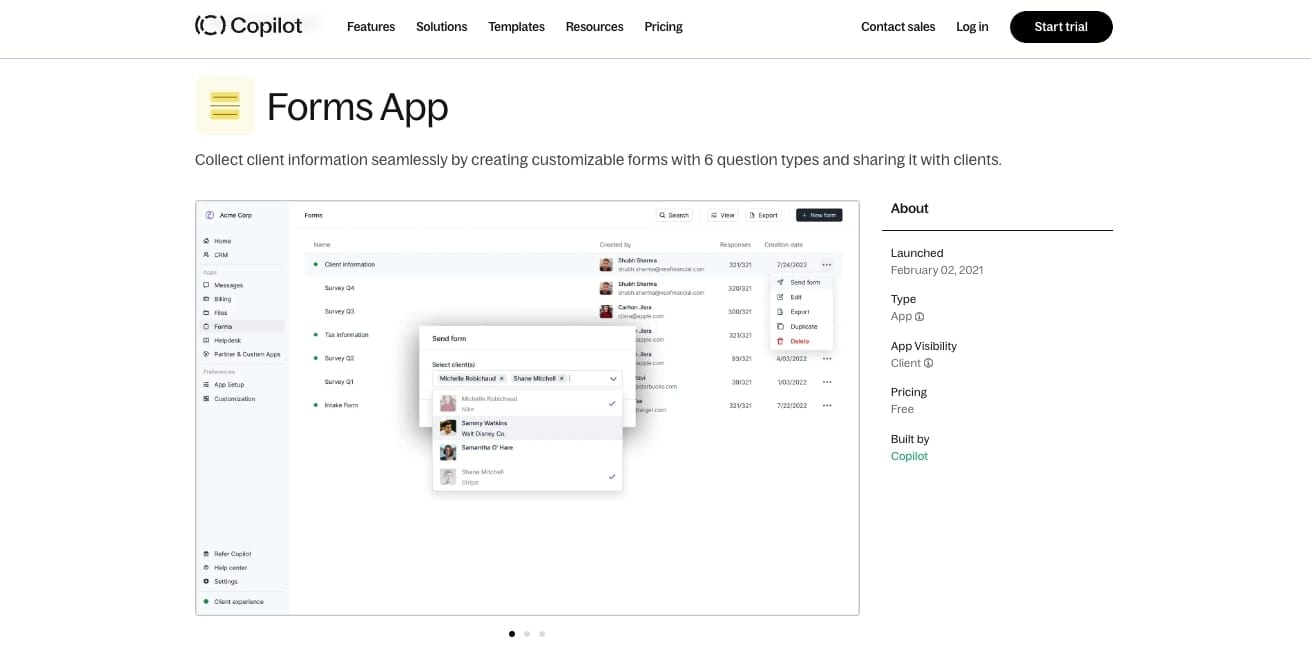
Over the years, Copilot has made it fairly plug-and-play when it comes to setting up the basic features of your portal. But, it’s good to gain client feedback on their experience working. For example, you can use Copilot’s forms app to ask existing clients what they like and what can be improved about their experience.
And depending on the types of services you offer, you can also integrate things like content calendars, spreadsheets, SEO dashboards, and a lot more. On top of that, you can also leverage Copilot Automations to automate different workflows, like sending automated welcome emails and automating your onboarding process.
How your client portal looks also matters. If necessary changes come up over time (like changing button colors), don’t hesitate to make those changes as well. After all, a garden is both functional and aesthetic.
Bridging the gap between your website and client experience
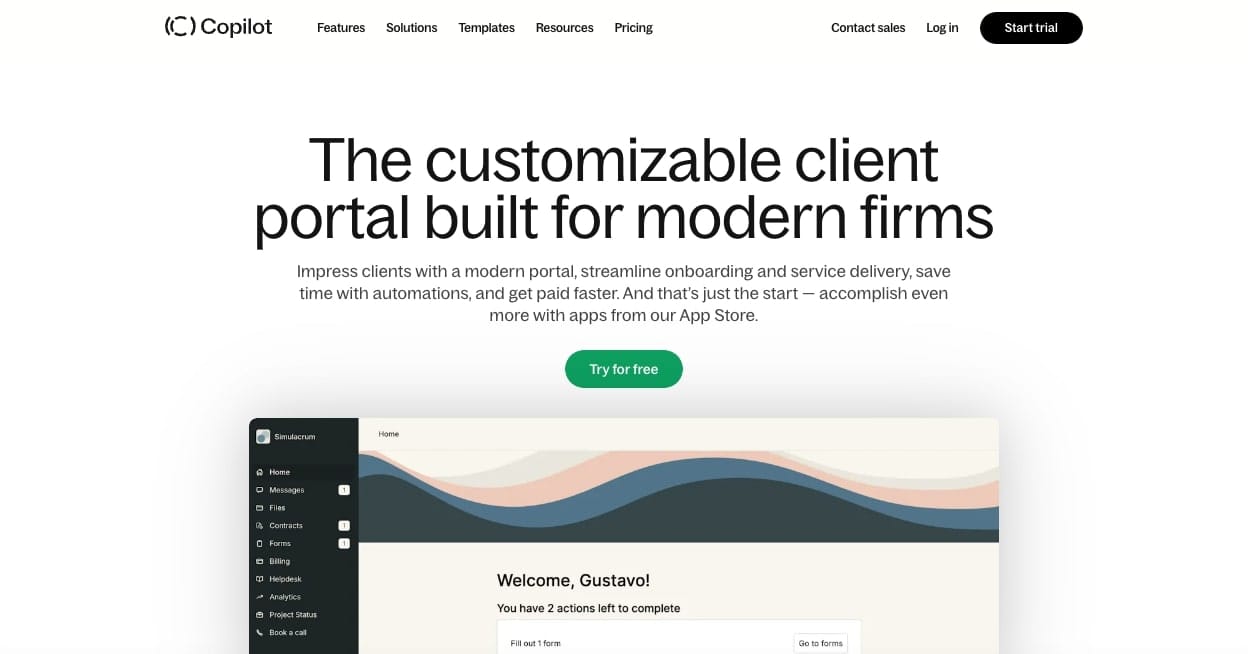
The client experience is everything when it comes to running a service business. Your business is more than just you providing a service that’s valuable. Communication, how you make your clients feel, and making sure you get paid on time all lead to a healthy and sustainable service business.
This is why it’s so important to bridge the gap between a potential client landing on your marketing website and getting access to their own personalized workspace when working with you.
Luckily, tools like Framer make it easy to build a beautiful marketing website. And tools like Copilot make it easy to create client portals and have a back office for your entire business. Combining the two, and making them work together, is how you set yourself apart from other service providers and create a client experience that is so memorable your existing clients will want to refer you to others.
Share this post
Sign up for our newsletter
Subscribe to our newsletter to receive emails about important announcements, product updates, and guides relevant to your industry.
